Easter is right around the corner, and one of the best traditions is decorating Easter eggs! Whether you’re looking for a fun family activity, a unique centerpiece, or a creative way to celebrate the holiday, these egg decorating ideas will inspire you.
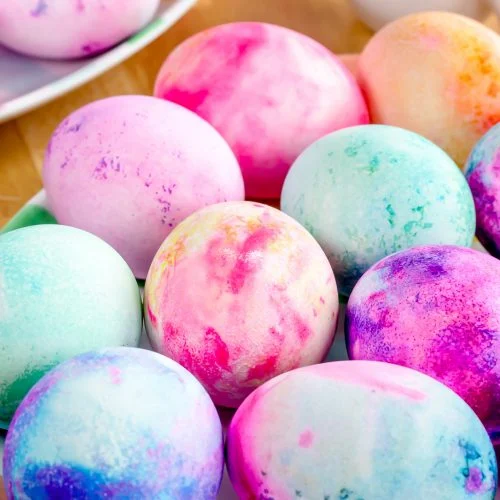
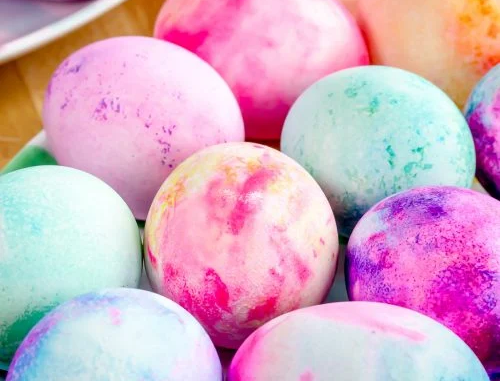
Marbled Magic with Shaving Cream
What You’ll Need:
- Hard-boiled eggs
- Shaving cream (foam, not gel)
- Food coloring
- Toothpick
- Paper towels
Directions:
- Spread a layer of shaving cream on a tray or plate.
- Add drops of food coloring on top.
- Use a toothpick to swirl the colors into a marble effect.
- Roll an egg through the mixture until coated.
- Let it sit for 10 minutes, then gently wipe clean with a paper towel.
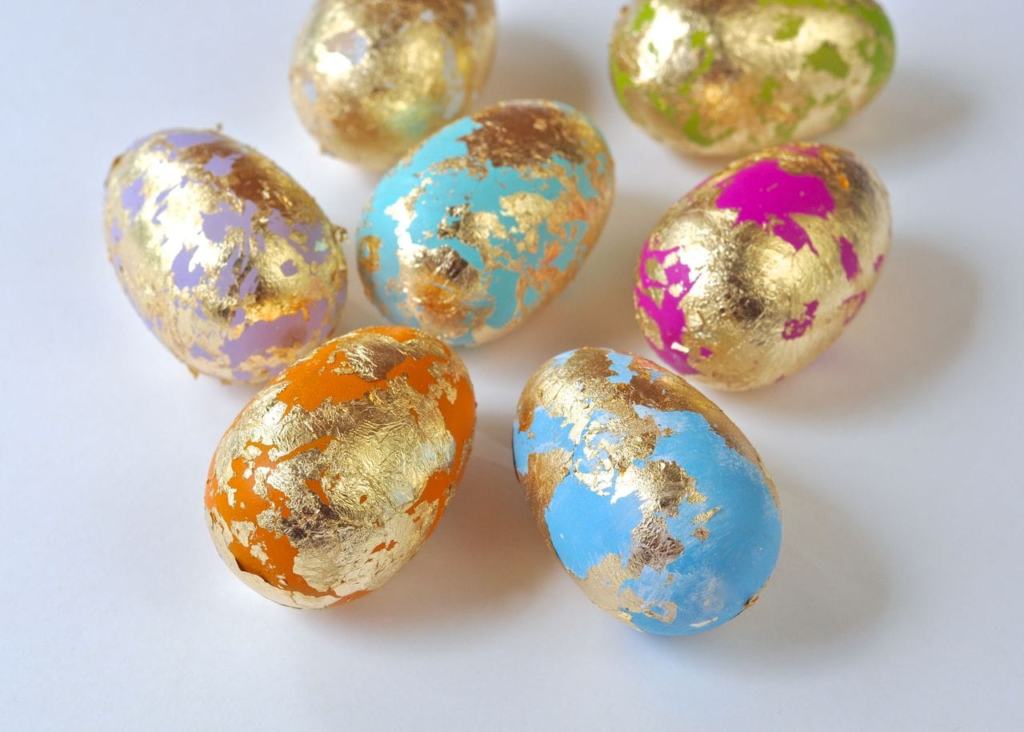
2. Gold Leaf Glam
What You’ll Need:
- Dyed or plain eggs
- Gold or silver leaf sheets
- Mod Podge or adhesive
- Soft paintbrush
Directions:
- Apply a thin layer of adhesive or Mod Podge to random spots on the egg.
- Press gold leaf gently onto the sticky areas.
- Use a soft brush to smooth the gold leaf and remove excess flakes.
3. Natural Dye Creations
What You’ll Need:
- Hard-boiled eggs
- Natural dye ingredients (red cabbage, beets, turmeric, onion skins, etc.)
- Water
- White vinegar
Directions:
- Bring 2 cups of water to a boil and add 1-2 cups of your chosen natural ingredient.
- Simmer for 15-30 minutes, then strain the liquid into a bowl.
- Add 1 tablespoon of white vinegar.
- Submerge eggs in the dye and let them soak for at least 30 minutes or overnight for deeper colors.
- Remove and let dry.
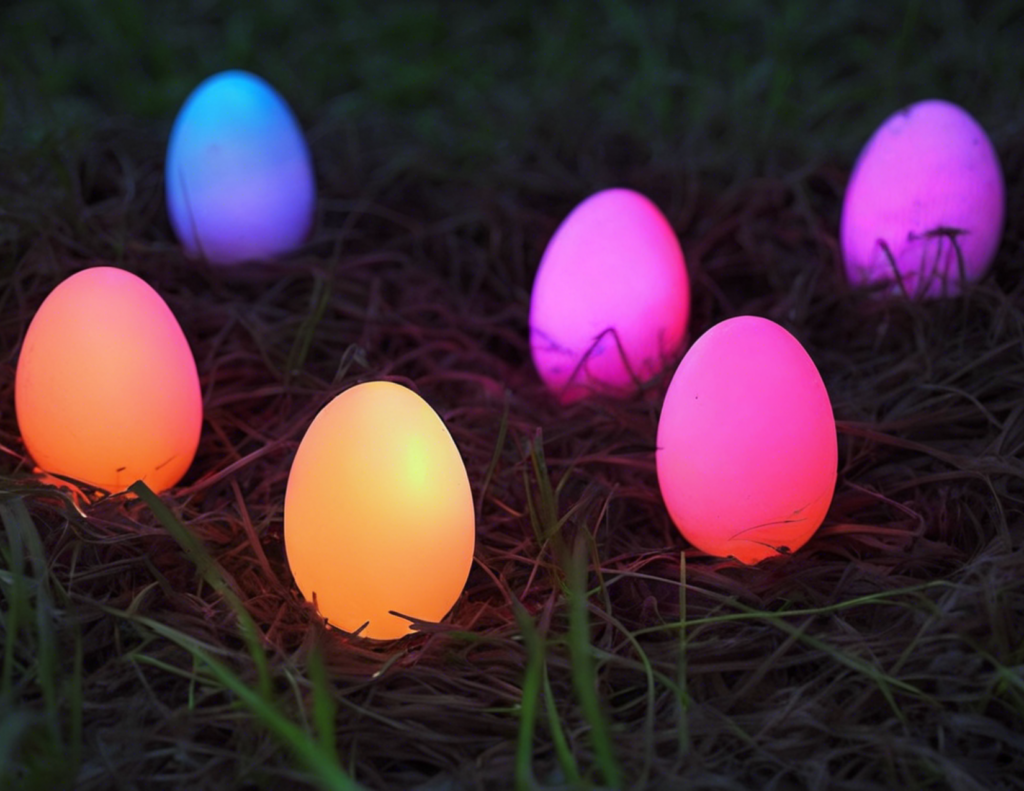
4. Glow-in-the-Dark Eggs
What You’ll Need:
- Hard-boiled eggs
- Glow-in-the-dark paint
- Paintbrush
- Water
Directions:
- Mix glow-in-the-dark paint with a little water.
- Paint the eggs evenly and let them dry completely.
- Charge under a light before hiding them for a glowing effect!
5. Sticker & Decal Designs
What You’ll Need:
- Hard-boiled eggs
- Temporary tattoos, washi tape, or vinyl stickers
- Damp sponge (if using temporary tattoos)
Directions:
- For tattoos, place the tattoo face-down on the egg and press with a damp sponge for 30 seconds before peeling off.
- For stickers or washi tape, press them firmly onto the egg.
- Smooth out any air bubbles for a perfect design.
6. Speckled Eggs with a Toothbrush
What You’ll Need:
- Hard-boiled eggs
- Acrylic paint (brown or black works best)
- Old toothbrush
- Water
Directions:
- Mix a few drops of water into acrylic paint to thin it slightly.
- Dip an old toothbrush into the paint.
- Hold the toothbrush over the eggs and flick the bristles with your thumb to create speckles.
- Let dry before handling.
7. Lace or Doily Stenciling
What You’ll Need:
- Hard-boiled eggs
- Lace fabric or doilies
- Acrylic paint
- Sponge brush
Directions:
- Wrap the lace or doily tightly around an egg.
- Use a sponge brush to dab paint over the lace.
- Carefully remove the lace and let the egg dry.
8. Watercolor Wonder
What You’ll Need:
- Hard-boiled eggs
- Watercolor paints
- Paintbrush
- Cup of water
Directions:
- Dip a paintbrush in water and lightly wet the egg’s surface.
- Use watercolor paints to blend soft colors onto the egg.
- Let dry before handling.
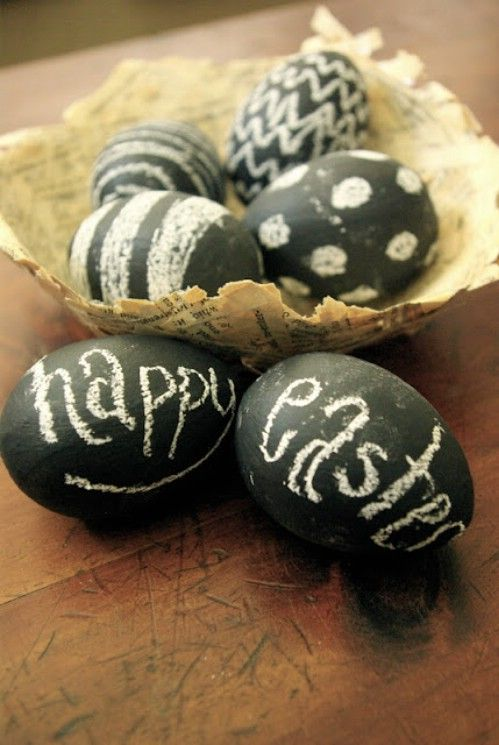
9. Chalkboard Eggs
What You’ll Need:
- Hard-boiled eggs
- Chalkboard paint
- Chalk or chalk markers
Directions:
- Paint eggs with 2-3 coats of chalkboard paint, letting each coat dry.
- Once dry, use chalk or chalk markers to draw designs or write messages.
10. Melted Crayon Art
What You’ll Need:
- Hard-boiled eggs (still warm)
- Crayons
Directions:
- While eggs are still warm, gently draw on them with crayons.
- The wax will melt as you color, creating a smooth, vibrant effect.
- Let the eggs cool before handling further.
These fun ideas will bring creativity and excitement to your Easter celebrations. Whether you prefer classic dyeing techniques or unique modern twists, there’s something for everyone to enjoy.
Happy decorating and Happy Easter!